Ah, gnocchi (pronounced nyaw-kee): what fond memories I have of thee. If you are not familiar with gnocchi, you're missing out. These adorable little dumplings are a traditional Italian treat, made with either potato or ricotta cheese, boiled, and often seared in butter or tossed with an herby sauce. But, of course, my love for gnocchi goes far beyond their unique taste and texture. As with any true human-food-romance, I share a sort of emotional connection with this dish, and with the fact that each dumpling is completely different and tells its own story.
Exhibit A (Photograph is from
http://www.sallypasleyvargas.com, an absolutely wonderful food blog):
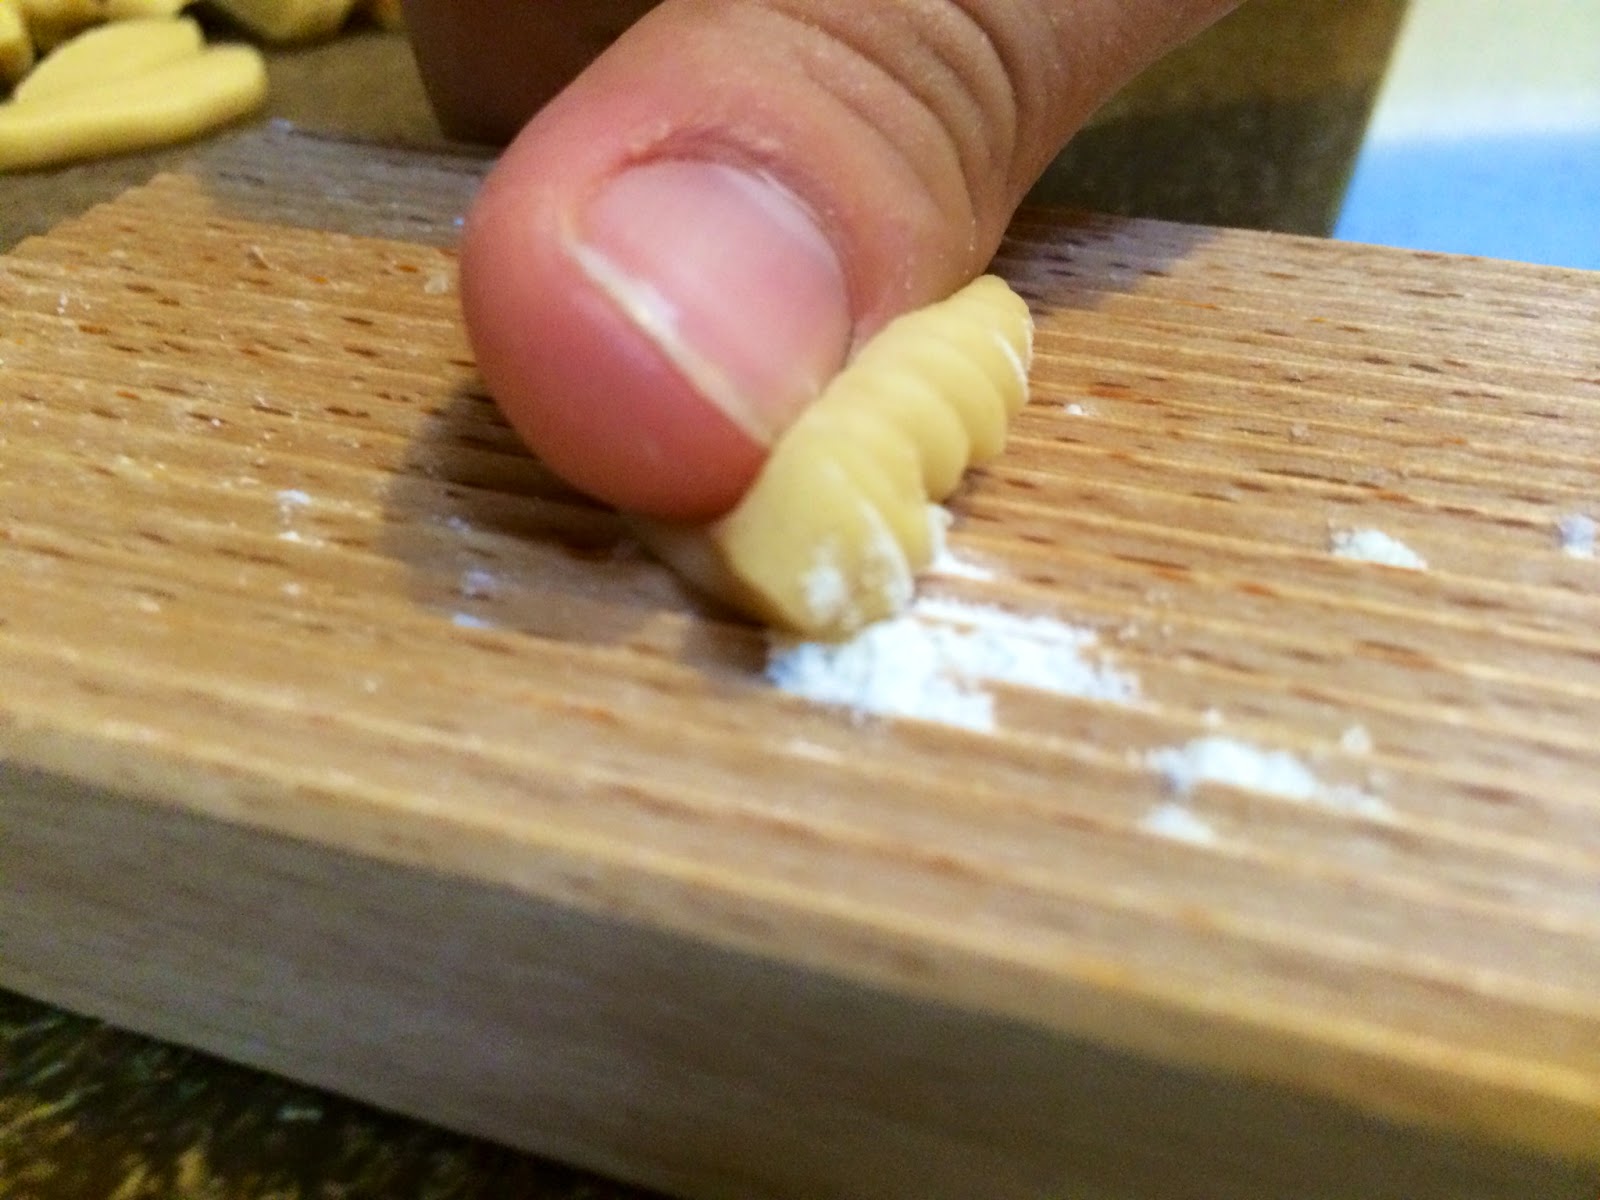
Notice the shape of these dumplings, and the fork on the bottom right. Gnocchi have a unique ridged shape that, when home-made, must be done by hand with either a fork or a nifty little tool called a gnocchi board - but I prefer using a fork for a more rustic outcome, as well as a much more nostalgic experience. Now those ridges means that each and every single dumpling is handled individually, crimped by hand with a fork, and inspected by the gnocchi-artist for quality assurance. A plate of homemade gnocchi is special in a way that not many foods are, and that is that each single gnocchi on that plate is a little different, and that they were each made and shaped with a huge amount of time and love. Fresh gnocchi isn't a plate that can just be slapped together on your lunch break, but with a little time and a lot of care, you can create something truly amazing that will not only taste great, but it will make you
feel great knowing that you crafted your dinner from scratch.
For a long time, gnocchi was almost unheard of in the states, even on the east coast where "Italian" culture is pretty popular. I have vivid memories of going to "Italian" restaurants of the late 90's and asking for gnocchi, only to be met with a blank, confused stare by a waiter who had obviously never heard the word in his life. Also, I remember quite well one particularly amusing classroom moments during my first year of culinary school, involving a student who was assigned a recipe for gnocchi, and - having never heard the word - sounded it out as ga-noh-chee. He spent the first 30 minutes of class asking if anyone had ever heard of ga-noh-chee before someone finally explained what they were and how to pronounce them. He had changed majors by the end of the trimester. Now does that mean that they was impossible to find until recently? Of course not! It was just a bit of a scavenger hunt. Although that has changed, and gnocchi can be found at the tables of many rustic Italian restaurants and bistros today, but the obvious truth is that no restaurant gnocchi will ever compare to what you can make at home. For me, gnocchi are a great go-to item when I'm planning dinner for my family or friends. Not only does the flavor and craftsmanship impress, but many Italian friends have never seen or heard of this authentic dish, and there's no better feeling than introducing a friend to their new favorite food.
As previously stated, gnocchi can be made from either potato or ricotta cheese, so here are the recipes that I use for each dough.
Ricotta Gnocchi
2 cups ricotta
2 large eggs, lightly beaten
1 1/2 cups grated Parmesan cheese
all-purpose flour as needed
1/2 stick unsalted butter
salt to taste
Potato Gnocchi
6 russet potatoes, baked, skinned and mashed (or some of last night's leftover mashed potatoes)
4 egg yolks
all-purpose flour as needed,
salt to taste
For both dough recipes, start by combining all ingredients except flour in a bowl. Slowly add flour while mixing until a soft, somewhat sticky dough is formed. Once your dough is formed, you do not need to let it rest before forming your gnocchi. To form your gnocchi, simply take a handful of dough, and roll it out into a log, about 1/2 in or larger if you want bigger gnocchi. Using a knife, cut your dough log into pieces, depending on how large you want them to be. Now comes the fun part.

Take one of your gnocchi and roll it into a ball between your hands. Then, roll it gently over the back of a well floured fork. You should end up with small oval dumplings with even ridges. Don't get discouraged if your first few gnocchi don't come out well. It takes some practice to learn the technique, but it's well worth the practice, and rolling gnocchi with your family or friends can be a fun social event before dinner. Once your gnocchi are formed, lay them out in a single layer on a floured surface. When you're ready to cook them, just drop them into a pot of salted boiling water. Unlike homemade pasta, fresh gnocchi will take a couple of minutes to fully cook through, and they can be doughy when not fully cooked.
As for sauce, I like to keep it simple. Gnocchi go great with three things: butter, herbs and vegetables. I like to saute some herbs and garlic in a little butter while my gnocchi are cooking. When they're finished, I toss my gnocchi in the pan with the butter and let them get brown on one side. Be sure to do this in small batches to avoid over-crowding your pan. If you want to add vegetables, add them before the gnocchi to let them cook, or precook them and toss them in with your finished gnocchi.
 |
Ricotta Gnocchi with Rosemary and Oven Roasted Beets
|
 |
| Potato Gnocchi with Basil, Chives and Pickled Radishes |